

Have you ever thought about designing your own train in Roblox? Perhaps you've seen other players operating amazing trains on intricately designed tracks and wished you knew their secret. Don't worry, you're just a few steps away from discovering how to make a train in Roblox in a fun and easy way, even if it's your first time designing in the game.
In this article, we'll take you on an exciting journey that's just as thrilling as driving the train itself! You'll learn how to design your own track, add motion using programming, and customize the train's appearance to your liking. We'll also discuss innovative ways to enhance the gameplay with TechCard add-ons, which offer exclusive content that will elevate your Roblox experience. Follow along with us to become an expert in building virtual trains!
How do I make a train in Roblox?
Before you begin creating the train in Roblox Studio, you will need a simple but essential set of tools to ensure the project is executed correctly:
- Roblox Studio: This is the basic program in which you will build the train track and its body and control all the details.
- User interface knowledge: It is essential to be familiar with how to use the tools within the studio, such as moving parts, adjusting coordinates, and activating the Snap To Grid option to achieve greater accuracy during construction.
- Parts: You will use them to make up every part of the train and track, from the rails to the carriages.
- Connecting using Welds or WeldConstraints: helps to fix the parts together so that the train moves as one unit without scattering.
- A simple script: to dynamically control the speed and direction of the train during the experiment.
What are the basic steps?
Following these steps will enable you to learn how to build a train in Roblox:
- Building the railway track: Start by creating straight and curved sections to form the complete track. Use the Snap To Grid option for precise alignment, and be careful not to leave small gaps that could disrupt train movement.
- Train body design: Create a wide base as a platform, then add the outer frame and wheels on top. You can use cylinders for the wheels and cube-shaped models for the frames, choosing different colors to highlight the details.
- Connecting the parts using WeldConstraints: After the construction is complete, identify all the parts and connect them with WeldConstraints instead of Anchored so that the train can move smoothly without remaining fixed in place.
- Adding the motion script: Place the script inside the train's base and use simple code to set the speed and direction. You can adjust the values later to achieve a suitable speed, as excessive speed can cause the train to derail, especially on curves.
- Testing and troubleshooting the train: Activate Play mode to watch the train in motion. If you notice any abnormal movement or vibration, check the connection points and the distances between the parts.
What is the importance of simple programming?
The programming at this stage gives the train interactive behavior, making the project feel alive and engaging. Writing a short script to adjust the speed and direction helps you understand the logical fundamentals of Lua within Roblox and reveals how code affects movement. With practice, you'll realize that learning how to build a train in Roblox isn't just about constructing models; it's an experience that develops your design skills, coding thinking, and precision.
How do I build a train track in Roblox?
Steps to build a railway track in Roblox:
How do I use Snap to Grid?
When starting to build a train track in Roblox, it's best to activate the Snap to Grid tool and set its value between 0.5 and 1 stud. This helps you align the pieces accurately and maintain consistent spacing between the rails, making the building process faster and more precise.
What is the method for installing the bars?
After placing the blocks parallel to each other with 4 studs between each rail, make sure to activate the Anchored feature for all parts of the track. This way, the rails will remain fixed in place and will not move when the game is running or when testing the train's movement on them.
How do I design simple curves?
When thinking about how to build a train in Roblox, designing the tracks correctly is one of the most important steps to ensure smooth and safe train movement. To add curves to the tracks, you can rotate blocks at a slight, gradual angle, or use pre-made curve elements from the Toolbox. Make sure these curves are as smooth as possible, especially when building your first track, to prevent the train from going off the track or becoming unstable while moving.
While working on the tracks, it's essential to continuously test the train's movement to ensure there are no gaps or deviations that could affect its operation or stability. You can also choose a distinctive color or material for the rails to make the track more visually appealing. While aesthetics don't affect the train's performance at all, they add a professional touch to the design and make the gameplay more enjoyable and realistic.
How do I design and prepare the train?
Begin by creating an unanchored base part to serve as the main body of the train, orienting it in the desired direction of movement. Next, place wedges in front of and behind the base at an appropriate angle to act as ramps, allowing the train to glide smoothly along the track. Secure these wedges using WeldConstraint to ensure they remain firmly attached to the base. You can also add small transparent blocks in front of and behind the base, one stud away from the track, to enhance stability and maintain direction during movement, ensuring these are also securely attached to the base.
How do I add decorations?
To make the train more aesthetically pleasing and realistic, add exterior walls and interior seats, ensuring the CanCollide = false option is enabled so they don't obstruct the train's movement during operation. Try to coordinate the colors and sizes to complement your overall design.
How do I connect the parts of the train?
All aesthetic and functional components must be connected to the main base using a weldconstraint, not anchoring, as this ensures the train moves as a single, harmonious unit. Be sure to clearly distinguish between the base parts and decorative elements to facilitate future modifications without compromising performance.
How do I add stations and advanced features to the train?
To build an automatic train stop that makes the train stop and leave on its own, you can follow these steps:
- Open the Toolbox and search for the words "automatic train" or "station sensor," then add the appropriate item to your Roblox train project.
- After adding it, modify its properties through the Properties window, such as SetName to name the station, and DepartDirection to specify the train's departure direction.
- They added a station sensor by creating a long section of about 800 studs, which they placed near the track to detect the train as it passed.
- Set the CanCollide property to false so that the train is not physically affected by it, then link it to a smart script that will temporarily stop the train upon arrival.
- After completion, test the system to ensure that the train stops and then starts automatically according to your settings.
What is the importance of sensors?
Sensors add a smart element and precise control to train movement in Roblox. They act as digital eyes, detecting the train's passage and triggering programmed events like stopping or opening doors. Without them, train control becomes manual and less realistic. Therefore, using them mimics real-world train systems and provides a more professional and interactive gameplay experience.
How do I attach wheels to a train?
To add wheels, or what is known as a bogie, to the train, follow these simple steps:
- From Toolbox, look for the VehicleSeat or VS2 template and add it to your project.
- Place the wheels in the appropriate location under the train so that they align with the direction of the track.
- Attach the wheels to the train body using WeldConstraint or by assembling them together via the shortcut Ctrl + G.
- After installation, they tested the movement to ensure that the train was moving steadily over the track.
These additions make your train in Roblox more balanced and precise in movement, and represent an important step towards a realistic operating experience that resembles real trains.
What are the best products for customizing your character in Roblox?
Want to add a unique touch to your Roblox character? TechCard offers everything you need to customize your character safely and easily. From rare accessories to various game cards , you'll find something to suit your style and budget, with 24/7 customer support.
Roblox Tiki Shoulder Body Skin
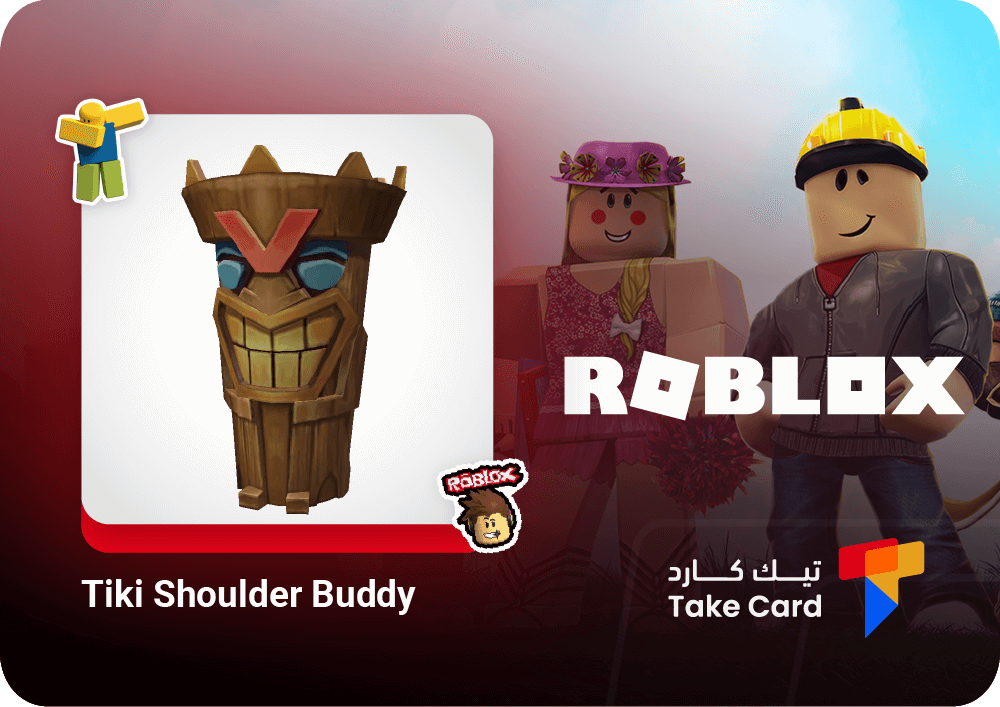
The Roblox Tiki Shoulder Buddy knife is perfect for fans of unique designs inspired by classic Polynesian culture. It features intricate details including a natural wood finish, sparkling blue eyes, and a red headpiece that adds a bold touch to your character's look. This knife can be worn on the shoulder without affecting gameplay, making it a purely cosmetic choice that reflects a distinctive style.
Roblox Card - 400 Robux
A Roblox gift card worth 400 Robux provides a quick and secure way to top up your in-game balance. With it, you can purchase skins and accessories or build your own world without needing a bank card. It's perfect for everyone, especially those looking for an easy and safe way to customize their character or develop their projects in Roblox.
Roblox Card – 800 Robux
The Roblox card worth 800 Robux gives you more freedom to customize your character and embark on new in-game experiences. It can be used to purchase premium accessories or unlock paid games and experiences that support your creative projects. The card is available for [price missing]. A competitor, with the ability to purchase multiple items to expand your options within Roblox.
How can I personalize my character with aesthetic elements?
To make your Roblox character stand out and reflect your personality, you can easily customize your appearance and add accessories using the platform's tools. Here's a step-by-step guide to personalizing every aspect of your character.
How do I buy and prepare a Tiki knife?
To obtain the Tiki Shoulder Buddy knife, follow these steps:
- Log in to your Roblox account via browser or app.
- They went to Marketplace and used the search bar to find the item named Tiki Shoulder Buddy.
- After finding it, they chose to buy it or add it to the inventory.
- Go to Avatar Editor, and open the Shoulders section to select and equip the item.
- After saving, the knife will appear on the character in games that support displaying accessories.
What are the steps for using the cards for recharging?
When using a Roblox card from TechCard to top up your account, you can follow these steps:
- After purchasing the card, obtain the shipping code printed on it.
- Open the Redeem page on the official Roblox website.
- Paste the code into the designated field and press Redeem to activate the balance.
- The balance can be transferred to Robux or a Premium membership can be subscribed to directly from the same page.
- After activation, use the balance to purchase items or unique customizations for your character.
How do I change the character's color or add makeup?
To modify the character's appearance or add simple aesthetic touches:
- Open Avatar Editor from the account menu.
- Go to Head & Body and then select Skin Tone to change your skin tone as desired.
- If the makeup option is available, it can be added to customize the details in a more attractive way.
- When you save the changes, the character will be automatically updated in most games that support customization.
If you are a developer within Roblox, you can list any new accessory to the game using the item ID via Roblox Studio to expand customization options for players.
Important tips for the success of the train project in Roblox
- Always use WeldConstraints or Motor6D when joining train parts; these tools keep the design stable during operation. Avoid anchoring parts completely, as this prevents the train from moving smoothly—a common mistake among those learning how to build a train in Roblox for the first time.
- Test your train project frequently within Roblox Studio using Play mode. This way, you can immediately spot any errors, whether in the way the pieces fit together or in the programming. This experimental step is essential for understanding how to build a train in Roblox in a practical and enjoyable way.
- Gradually increase the train's speed. High speed might seem exciting at first, but it often leads to derailments. A careful approach will help you achieve realistic and smooth movement, making the experience more professional.
- Watch educational videos on YouTube, in both Arabic and English, to learn about advanced railway and curve design methods. These videos provide a practical understanding with visual steps and precise details that are difficult to grasp through text alone.
- Start by building a very simple train, without adding complicated details or many stations. Over time, you can develop the design and gradually add components. This is the ideal way to learn how to build a train in Roblox without getting bogged down in complexities and wasting your time.
- Share your projects with your friends or within the Roblox community to receive feedback. Constructive criticism from others will enhance your train design expertise and open up new ideas for development and innovation.
Each of these steps will bring you closer to achieving a complete project, and give you a precise practical understanding of how to make a train in Roblox from the initial design stage to the final in-game experience.
Frequently asked questions about how to make a train in Roblox
Are there trains in Roblox?
Yes, there are many train games in Roblox, and you can easily design your own train. Roblox Studio provides powerful tools that help you build train cars, modify track layouts, and even add motion and speed effects to make the experience more realistic and enjoyable.
Can a 12-year-old child create a game on the Roblox platform?
Absolutely! Children as young as 12 can start creating their own games on the Roblox platform using Roblox Studio, a great opportunity to learn the basics of programming in an interactive way and develop creative thinking and problem-solving skills from an early age.
How to create an automated train system in Roblox Studio?
To create an automated train system, all you need to do is get an automated train and put it in the project, then add or create the rails (tracks), and then use the Station Sensor tools from the toolbox to identify the stops and run the train automatically.
Read also: Roblox: How to set up auto-click